This year I wanted to grow a lot of vegetables in the garden behind our apartment. The last few years I already grewed tomatoes and cucumber on my balcony. Of course a garden is so much better to grow stuff because there is just a lot more soil and room. However, it is safer to help the germination by using an indoor greenhouse. Luckily I got a pretty nice one as a birthday present 😀. I installed some LED lights inside that should help the seeds to grow once they have germinated. As a side effect, the warm up the greenhouse. To have better insights about temperatures on the different levels of the greenhouse I wanted to use a Raspberry Pi and connect some temperature sensor to it. Consequently, I would install some simple air conditioning if it appears to be too hot inside.
Temperature and Humidity sensor for the Raspberry Pi
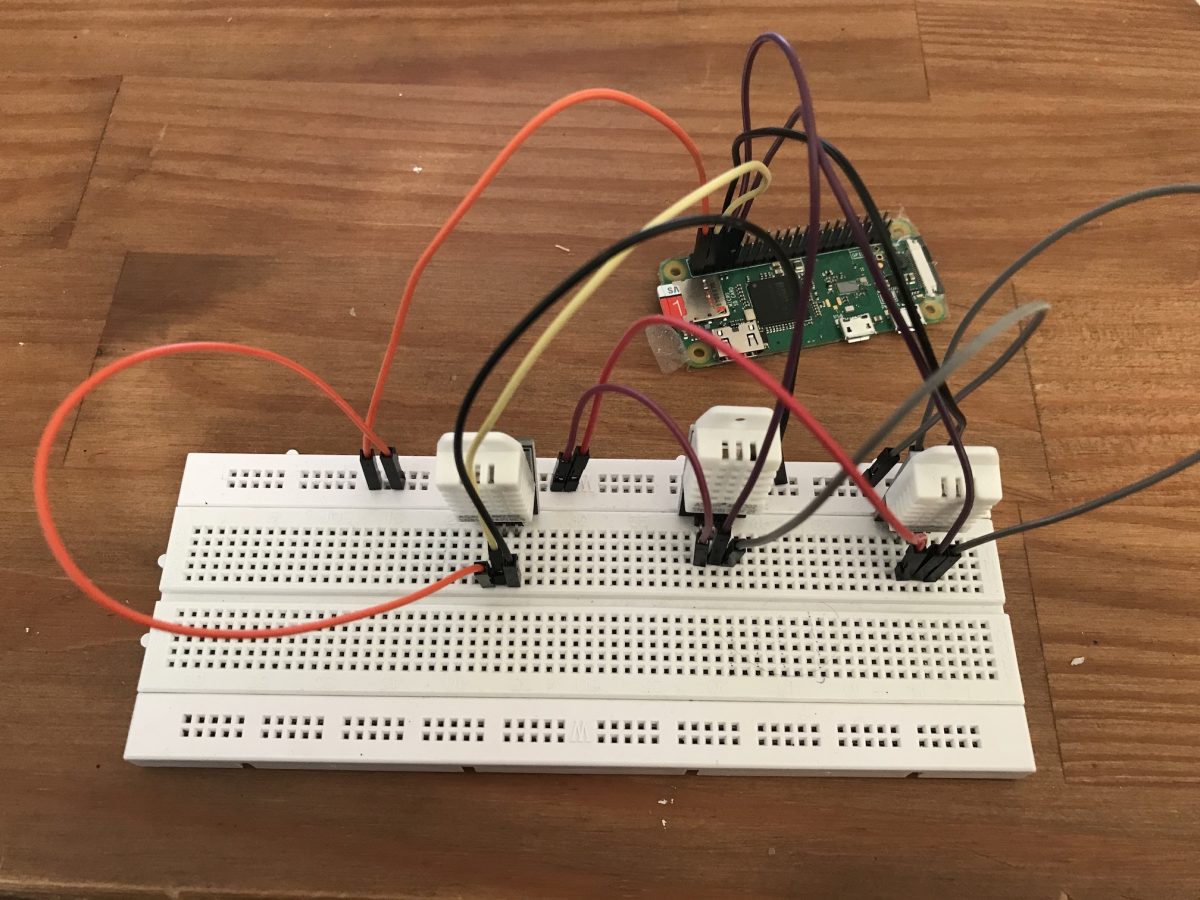
Luckily there is the AM2320 (and its variants) that can be easily connected to a Raspberry Pi. It is not only a temperature sensor, it can measure humidity as well. There are presoldered boards with three pin outbreaks that do not even require to solder any resistors to it. I just bought three of them on ebay because they have almost the same price as the sensor itself.
There is an easy to use library by the great people from Adafruit that you can use for reading the sensors. It includes code for all the supported variants.
See my other blogpost to learn about the minimal setup of a Raspberry Pi that I used for this ongoing project: https://mic.st/blog/minimal-setup-of-raspberry-pi-zero-w-with-ssh-over-wifi-connection/
So how do we connect to the sensor? If you have the three pin variant, you just have to connect +3.3V and GND to your Pi and chose one of the GPIO you want to use for the signal. That’s all. If you want to connect multiple AM2320 you just have to connect them to different GPIO pins.
Software
The Adafruit library we will use is a python library. Therefore we need python to run our script as well as git to download the library.
Firstly, connect to your Raspberry Pi via ssh and run sudo apt-get update
After that, run the following commands to get all the needed dependencies you need to run python and git:sudo apt-get install build-essential python-dev python-openssl git
Now we want to download the library and have a first try with the included demo file. Therefore you need to clone the repository for the library. Do that by running the following command in your terminal:git clone https://github.com/adafruit/Adafruit_Python_DHT.git
Change into the directory with cd Adafruit_Python_DHT and run sudo python setup.py install to install the needed drivers.
If the install command does not work, you need to install python-setuptools first via:sudo apt-get install python-setuptools.
Read out temperature and humidty with the demo script
Now you should be able to read the temperature and humidity from your sensor with the demo file in the library. You will find that in the examples directory. Change to this directory by calling cd examples.
Finally, run python AdafruitDHT.py 2304 4. If you look at this call, there are two parameters. The first parameter is for the sensor you use, the second one is for the GPIO pin where you connected your sensor.
If you open the example file (AdafruitDHT.py) with some texteditor you see the supported sensors and the needed arguments for loading their drivers (just run nano AdafruitDHT.py to see the file’s content):
sensor_args = { '11': Adafruit_DHT.DHT11,
                '22': Adafruit_DHT.DHT22,
                '2302': Adafruit_DHT.AM2302 }Code language: Python (python)
Consequently, if we wanted to use a DHT22 at GPIO7, we would run python AdafruitDHT.py 22 7. If you use an AM2302 at GPIO Pin 3 you would run python AdafruitDHT.py 2302 3 and so on.
As a result you should see some console output similar to:
Temp=22.0* Humidity=33.4%
This was a short introduction on how to use some widely used temperature and humidty sensors with the Raspberry Pi. In another post you will learn how to include the library in your existing project.
Sources: https://tutorials-raspberrypi.de/raspberry-pi-luftfeuchtigkeit-temperatur-messen-dht11-dht22/