iOS Apps
Home Renovation App
Landingpage with all the features and release information: https://homerenovation.tips
Technologies used
- SwiftData
- SwiftUI
- Apple Sign In
- Google Sign In
- In App Subscriptions using Revenue Cat
- Parse Framework
Idea for this app
During the process of buying a house I searched for an app that keeps track of the renovation budget in a really simple way. I did not find anything, that is why I decided to create someting. Also I did neither use the rather new SwiftData framework nor SwiftCharts. This app seemed like a good opportunity to try both of these.
Features
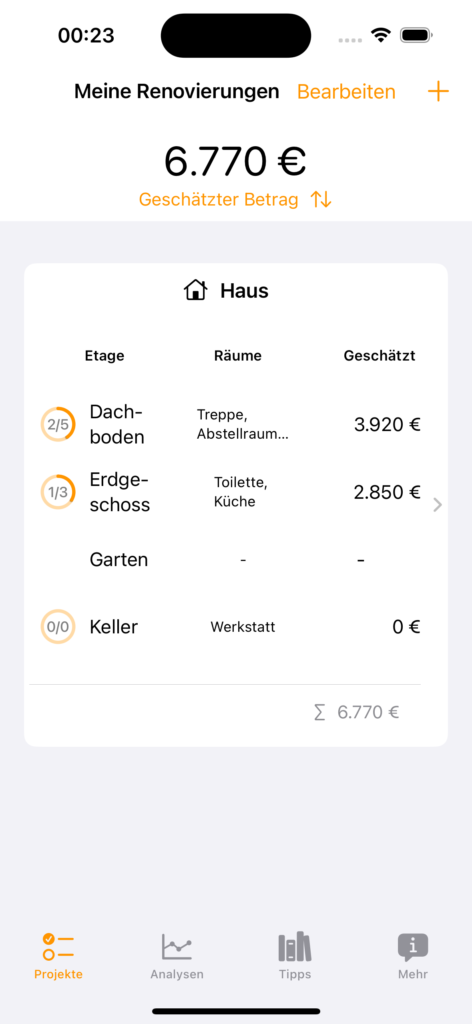
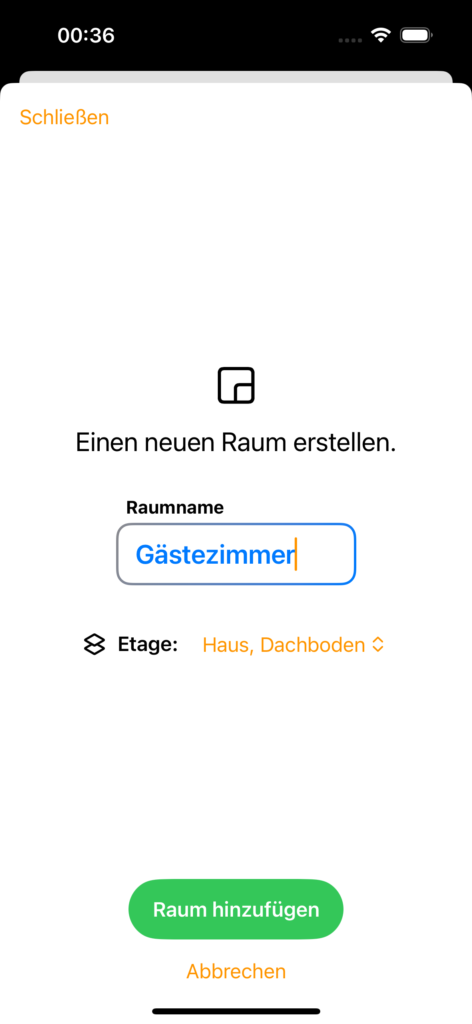
The basic idea is that you can have buildings, that can have floors, these floors do have rooms and the rooms do have renovations.
This is the underyling relationship for everything. On top of this, you can track progress of renovations in a simple “todo” or “done” way. This is summed up across all renovations, rooms and floors to draw nice little graphics.
Renovations always can have an estimated cost amount and a spent amount. This is currently just summed up and in a couple of places you can switch between both values to quickly compare them. E.g. if a certain floor, room or a whole building is above budget.
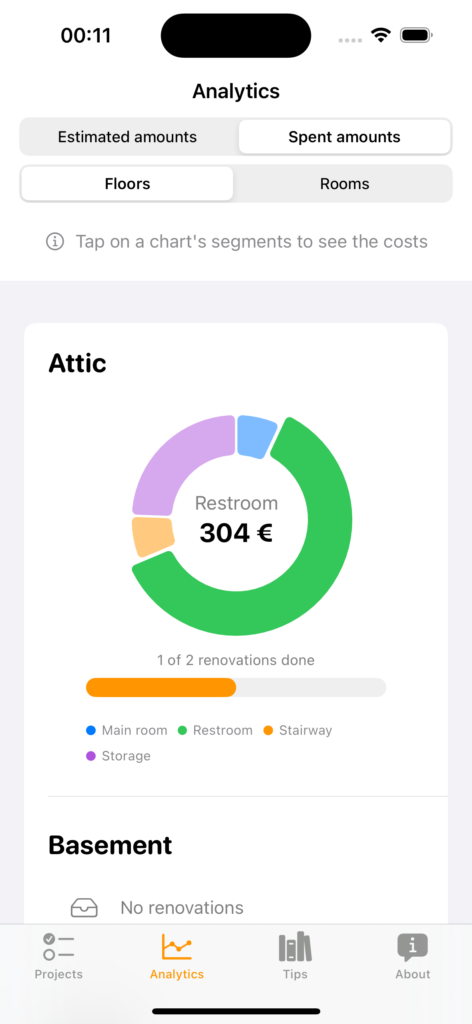
There is an analytics screen that shows the different amounts in some interactive donut charts. Based on the timestamps for renovations I am planning to also include some time of historical overview of the renovations.
A feature for sharing data across devices and maybe platforms later on is currently in development. I am using Parse as a backend for that.
Florra Plant Care Diary
Landingpage with all the features and release information: https://florra.app
Technologies used
- Swift
- Core Data
- Custom Transitions
- Notifications
- In App Subscriptions using Revenue Cat
- Plant.Net API
- Parse Framework
Idea for this app
Actually, I don’t remember the initial starting point for developing this app. I always liked having plants, caring for plants and propagating them. I was not really interested in some watering reminder (there are also hundreds of them in the Appstore), I wanted to have some kind of manager or diary where you can leave all the information about any plant. E.g. when did you re-pot it, gave it some water, pruned it etc. Everything should be pretty simple and local first. I am not a big fan of uploading everything straight into the cloud. Therefore, everything should be saved on the device.
Very early on I thought it might be nice to group plants. To not over-complicate it one level deepness should be enough. So no group in a group in a group.
Features
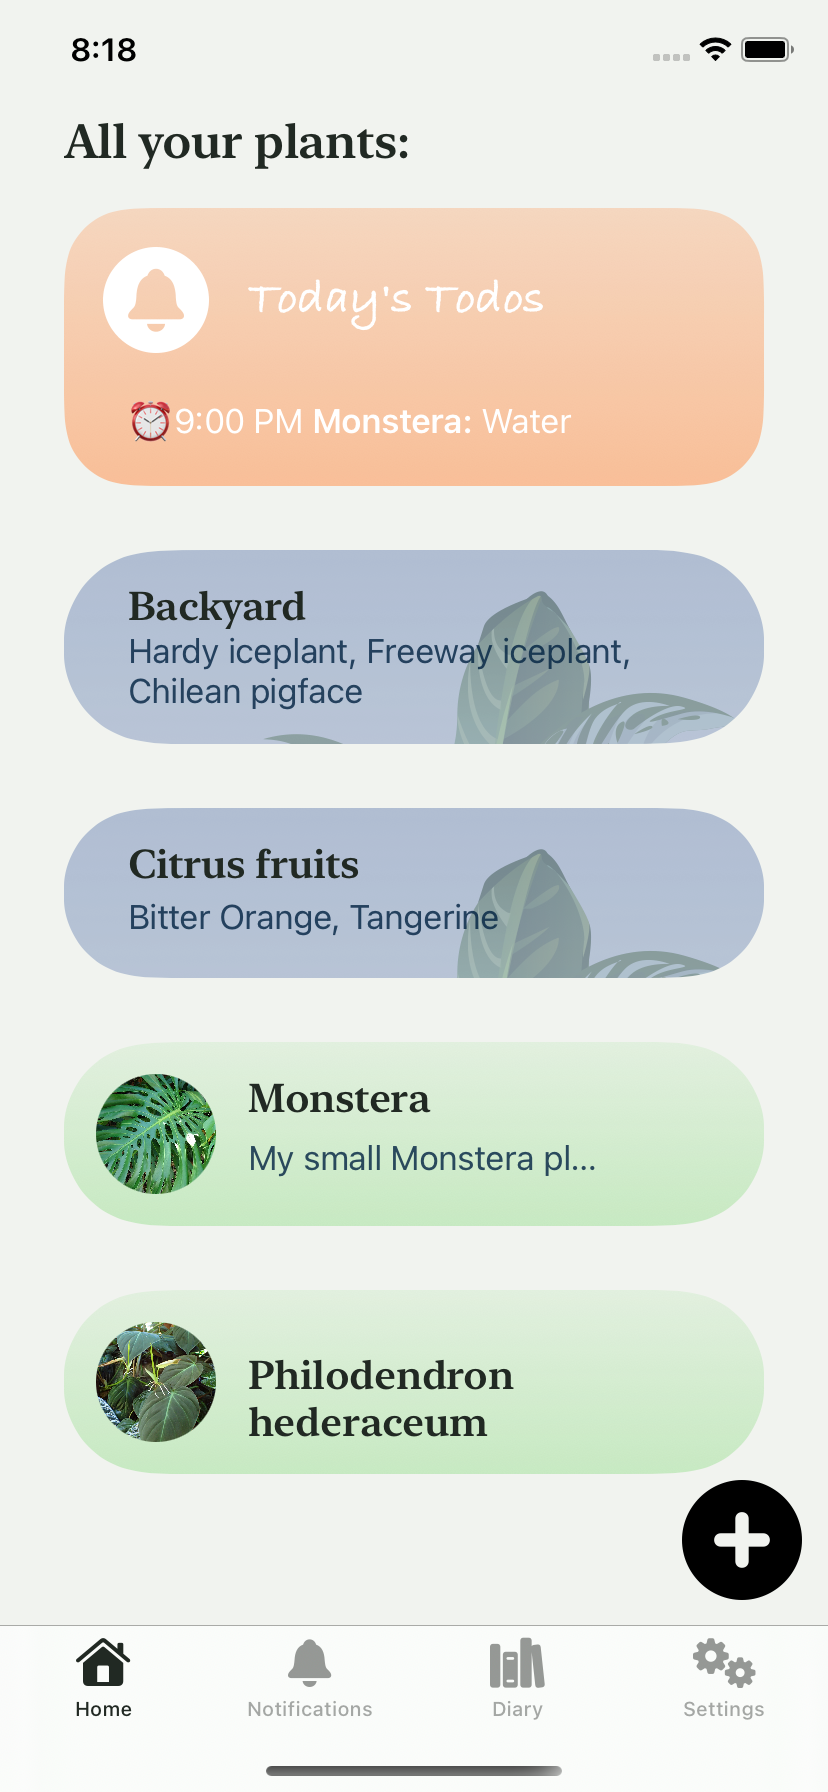
If you open up the app, you have some empty tabs asking you to add plants groups or any other data. There is a “Home” screen showing all your groups and plants, a “Notifications” tab showing all the reminders on plants or groups set up in a filterable way and a “Diary” that shows all of your saved content, e.g. photos and texts with a date and an optional category.
It was important for me to connect all of these data points, e.g. a plant can have numerous events, each event can have up to three photos and each event can be categorized. You can also create custom categories if the default ones are not enough.
Plants can be moved into and out of groups whenever you want. Everything else moves with it automatically.
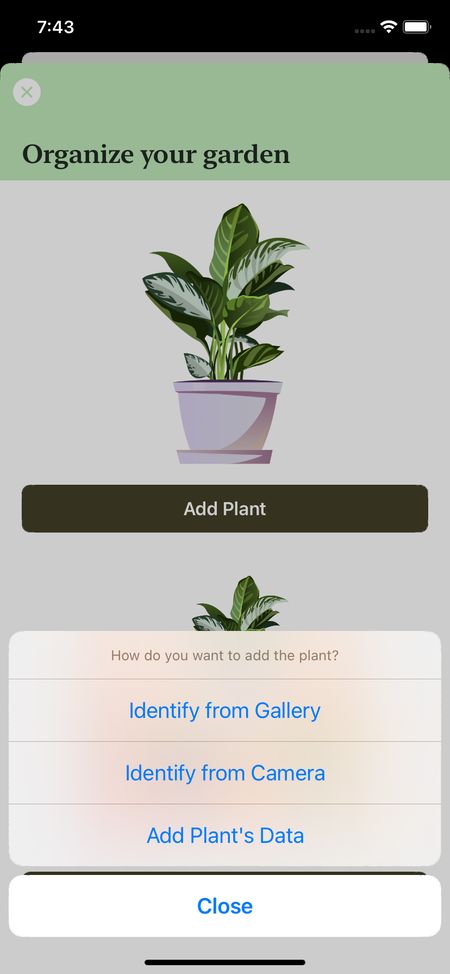
As an extra feature I added plant recognition which works via the device’s camera or a photograph from its gallery.
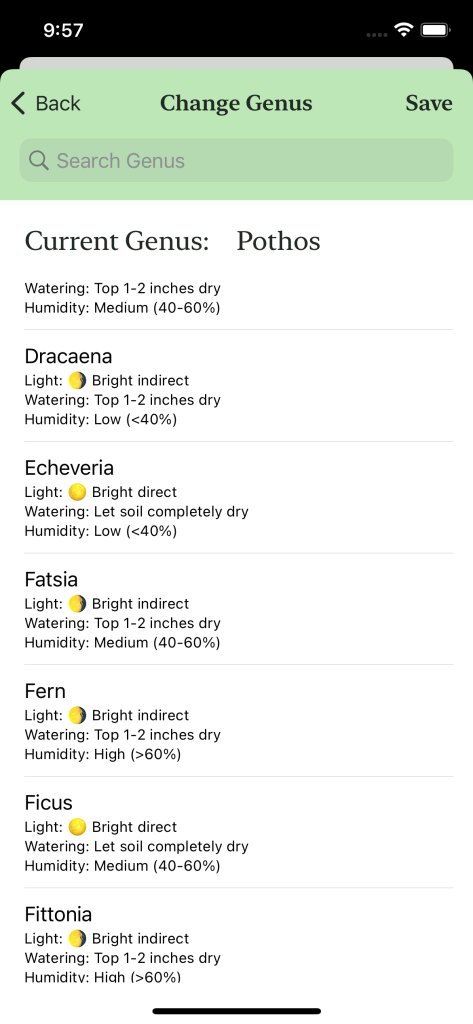
One of the latest features is plant care data. This can be set up for each plant our you can pick some default data based on the plant’s genus. The plant care data is fetched from a server, so that I am able to quickly update it whenever needed.

Bread Alarm iOS App
Technologies used
- SwiftUI
- Combine
- StoreKit
- UserNotifications
- AVKit
- WebKit
- Sketch (for drawing the bread illustration)
Idea for this app
When I bake sourdough bread, I start with a higher temperature and then turn down the oven to a lower temperature. In the past I sometimes forgot to set a new timer after setting the first timer. So I built an app that offers two timers that finish after each other.
Features
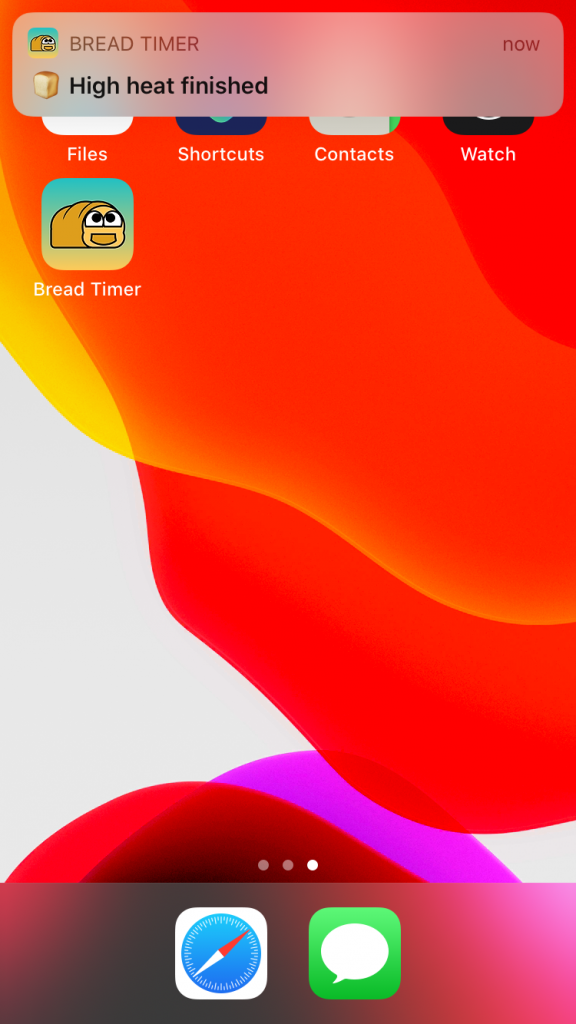
There are two picker elements to select the amount of time for both temperatures, a label showing the total time and the time when everything will be finished. As time flys by, the pickers also change their value. The app saves it’s state constantly, therefore users can even close the app completely and they will see the states of any unfinished timers. Whenever a timer finishes, the user will get a local notification with a custom sound.
Unfortunately Apple does not allow to override device muting with custom sounds. Therefore, users have to unmute their device. Although you can request this capability for your app, as far as I understood it is only allowed for critical applications (e.g. healthcare). In addition to that, you can request it only as a team and not as a single developer.
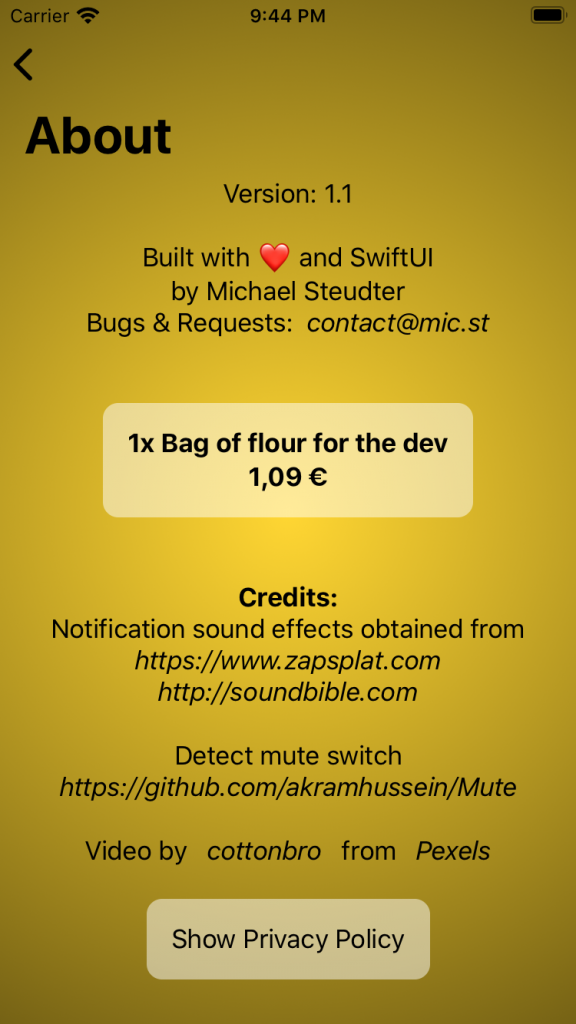
I also wanted to learn how to implement in app purchases (IAP) and added one to tip me with 1,09€ (or 0,99USD). For the first time a user buys this, the hat on the home screen gets a nice baker’s hat as an upgrade.

Flippy Vocabulary iOS App
Technologies used
- UIKit
- WebKit
- Storyboards with Auto Layout
- Sketch (for designing the first prototype)
- Testflight for Beta testing
About the app
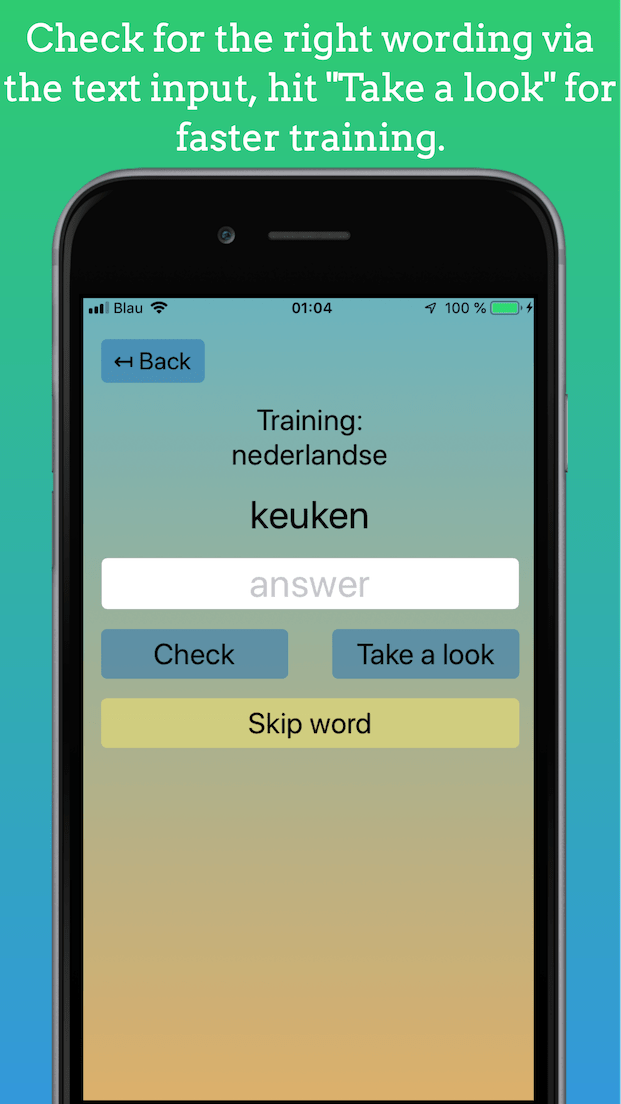
The core feature of the iOS FlippyApp is a very simple adaptive learning algorithm that draws words based on the learning progess. Users can create as much languages they like, everything is saved on their device.
Sharing languages
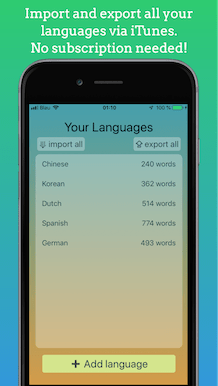
Users can share languages as csv files for backing them up or editing them on another device. I used Swift’s UIActivityController for that so users can share language files via any supporting service or App, e.g. Mail, WhatsApp, Telegram or Airdrop.
FlippyApp is my first app that I sucessfully released to the iOS AppStore. I learnt a lot about the App Store review process while publishing this first app. You can read more about it here: https://mic.st/blog/my-first-intransparent-app-store-review-adventure/
Other
Raspberry Pi x Greenhouse
Idea for the project
I am a hobby gardener for quite some time and I always enjoyed to raise up plants from seeds. In the past I relied upon raising them in small plastic bags. This is not always the best option because of the low light conditions that are indoors.
Luckily, I got quite a big greenhouse for my birthday that I equipped floor after floor (it has three 🙃) with LED lights connected to a 230V time switch. I felt the whole thing heating up pretty tropical but I had now idea how much it was actually heating up. So, I decided to put some electronics in there.
The setup
Hardware
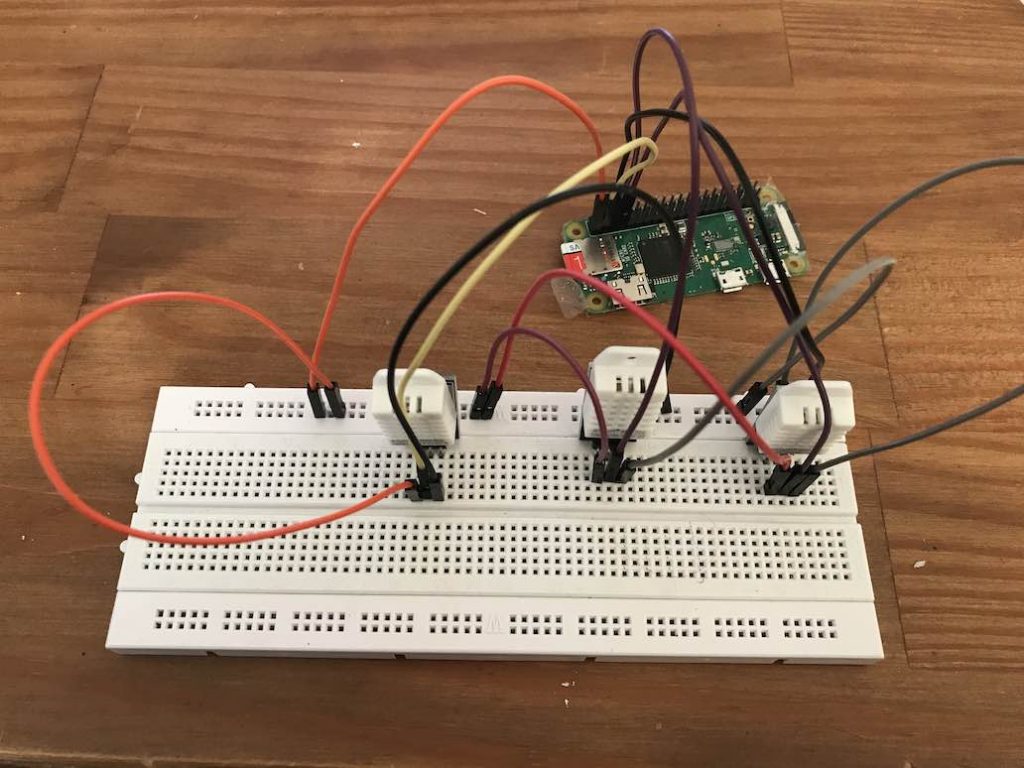
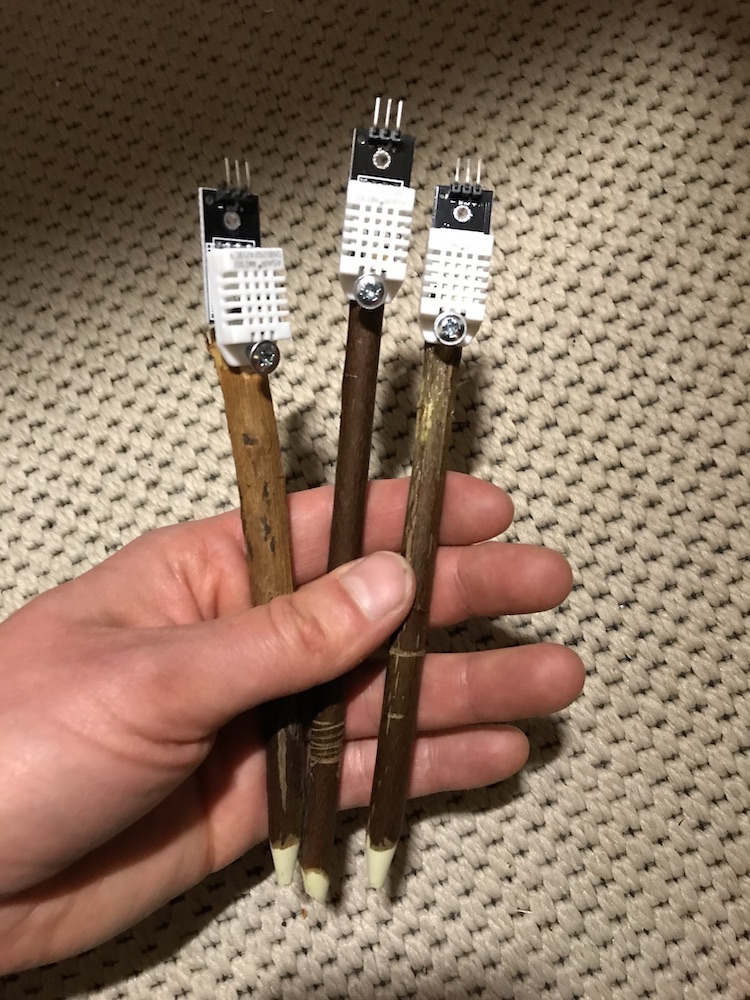
- RaspberryPi Zero W connected to our WiFi
- 3x AM2302 (temperature & humidity sensor)
- some meters of three core cable
Software
- Minimal setup for the Raspberry (Raspbian Lite)
- Python script for reading the sensors with the library
Adafruit_DHTand sending them viarequeststo my backend - Cron task executes this python script every 15 minutes
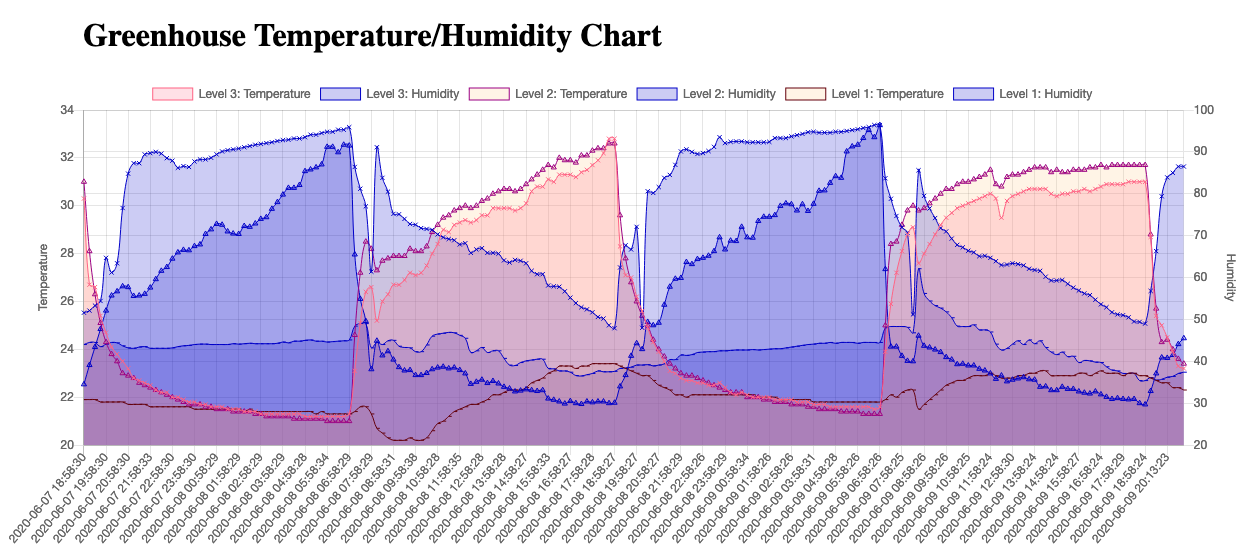
- My backend is running a MySQL Server where the six values are saved into a table together with a timestamp
- A PHP-script selects the last 600 entries, i.e. 200 per sensor and renders it to HTML via charts.js
Technologies
- Electronics, Raspberry Pi
- Python
- MySQL
- PHP
- HTML, CSS, JavaScript
See it in action: http://mic.st/tempLog/getTemperatures.php